
How to Fix a Leaky Pipe Under Your Sink: A Comprehensive Guide
Discovering a leak under your kitchen or bathroom sink is never a welcome surprise. That steady drip, drip, drip isn’t just annoying; it can lead to water damage, mold growth, and wasted water, ultimately costing you money. But before you call a plumber, know that many leaky pipe situations under the sink are easily fixable by the average homeowner. This comprehensive guide will walk you through the process, providing you with the knowledge and confidence to tackle this common plumbing problem head-on. We’ll cover everything from identifying the source of the leak to the tools and techniques you’ll need for a successful repair. Learn how to fix a leaky pipe under sink with our expert tips.
Understanding the Anatomy of Under-Sink Plumbing
Before diving into repairs, it’s crucial to understand the typical plumbing configuration under a sink. Familiarizing yourself with the different components will make diagnosing and fixing the leak much easier.
- Supply Lines: These flexible tubes carry hot and cold water from the shut-off valves to the faucet. They’re usually made of braided stainless steel or flexible plastic.
- Shut-Off Valves: Located on the wall under the sink, these valves control the water supply to the faucet. Knowing their location and how to operate them is essential before starting any plumbing work.
- Drain Pipes: This system carries wastewater from the sink drain to the main drainpipe in the wall. It typically consists of several interconnected parts.
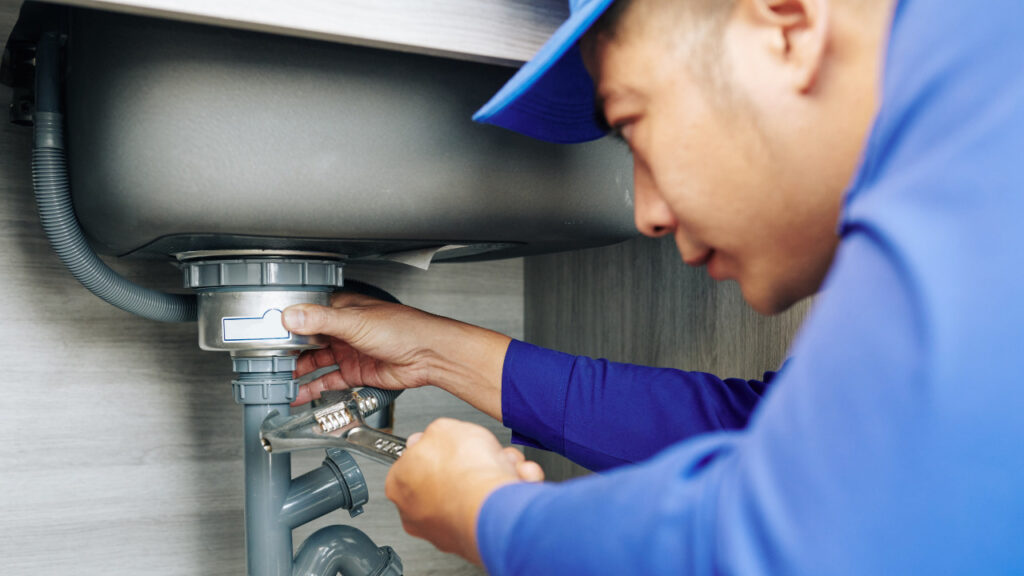
- P-Trap: The curved section of the drainpipe under the sink. It’s designed to trap water, which prevents sewer gases from entering your home.
- Tailpiece: The vertical pipe that connects the sink drain to the P-trap.
- Drainpipe Extensions: Additional sections of pipe used to connect the P-trap to the wall drain.
Identifying the Source of the Leak
The first step is pinpointing exactly where the water is coming from. A systematic approach will save you time and frustration.
- Dry Everything: Use paper towels or a clean cloth to thoroughly dry all the pipes, fittings, and the surrounding area under the sink.
- Observe Carefully: Turn on the faucet and watch closely for any signs of water. Check all connections, including where the supply lines connect to the faucet and shut-off valves, and where the drain pipes connect to each other.
- Check the P-Trap: The P-trap is a common source of leaks due to loose connections or corrosion.
- Run Both Hot and Cold Water: Test both hot and cold water to see if the leak is specific to one supply line.
- Check While the Sink is Draining: Fill the sink with water and then let it drain while observing the drain pipes for leaks. This can reveal leaks that only occur when a large volume of water is flowing through the system.
Essential Tools and Materials
Having the right tools and materials on hand will make the repair process much smoother. Here’s a list of essentials:
- Adjustable Wrench: For tightening and loosening nuts and fittings.
- Channel-Lock Pliers: For gripping pipes and fittings.
- Basin Wrench: A specialized wrench designed to reach nuts in tight spaces, such as behind the sink.
- Plumber’s Tape (Teflon Tape): Used to seal threaded connections.
- Pipe Wrench: For larger pipes (less common under sinks, but good to have).
- Bucket: To catch water during repairs.
- Towels or Rags: To clean up spills and dry surfaces.
- Replacement Parts: Be prepared to replace worn-out parts like supply lines, P-traps, or compression rings.
- Safety Glasses: To protect your eyes from debris.
- Gloves: To protect your hands.
Fixing Leaks in Supply Lines
Leaky supply lines are a common problem. Here’s how to address them:
Tightening Connections
Often, a leak at the supply line connection is simply due to a loose nut. Use an adjustable wrench to gently tighten the nut. Be careful not to overtighten, as this can damage the fitting. If tightening doesn’t solve the problem, proceed to the next step.
Replacing Supply Lines
If the supply line is cracked, corroded, or otherwise damaged, it needs to be replaced. Here’s how:
- Turn Off the Water: Shut off the water supply to the faucet by turning the shut-off valves clockwise.
- Disconnect the Old Supply Line: Use an adjustable wrench to disconnect the supply line from both the faucet and the shut-off valve. Have a bucket ready to catch any remaining water in the line.
- Install the New Supply Line: Connect the new supply line to the faucet and the shut-off valve, tightening the nuts securely with an adjustable wrench.
- Turn the Water Back On: Slowly turn the shut-off valves counterclockwise to restore the water supply. Check for leaks at the connections.
Repairing Leaks in Drain Pipes
Leaks in drain pipes can be a bit more complex, but still manageable with the right approach.
Tightening Connections
Similar to supply lines, loose connections are a common cause of drain pipe leaks. Use channel-lock pliers to tighten the slip nuts that connect the various sections of the drainpipe. Again, avoid overtightening.
Replacing the P-Trap
The P-trap is particularly susceptible to leaks. If tightening the connections doesn’t work, you may need to replace the entire P-trap.
- Prepare for Removal: Place a bucket under the P-trap to catch any water.
- Loosen the Slip Nuts: Use channel-lock pliers to loosen the slip nuts connecting the P-trap to the tailpiece and the drainpipe extension.
- Remove the Old P-Trap: Carefully remove the old P-trap.
- Install the New P-Trap: Install the new P-trap, ensuring that the slip nuts are properly aligned and tightened.
- Test for Leaks: Run water through the sink to check for leaks.
Using Plumber’s Putty and Teflon Tape
For threaded connections, plumber’s tape (Teflon tape) is your best friend. Wrap the tape clockwise around the threads before connecting the pipes. For slip-joint connections, use plumber’s putty to create a watertight seal around the flange.
Dealing with Corrosion
Corrosion can cause leaks in older plumbing systems. If you find significant corrosion, it’s best to replace the affected parts. Attempting to repair corroded pipes can be a temporary fix, but the corrosion will eventually lead to further leaks.
Preventative Maintenance
Prevention is always better than cure. Here are some tips to prevent leaks under your sink:
- Regular Inspections: Periodically check the pipes and connections under your sink for any signs of leaks or corrosion.
- Tighten Loose Connections: As part of your regular maintenance, tighten any loose connections you find.
- Avoid Harsh Chemicals: Avoid pouring harsh chemicals down the drain, as they can corrode the pipes over time.
- Flush Debris: Periodically flush the drain with hot water to remove any buildup of debris.
When to Call a Plumber
While many leaks can be fixed DIY, some situations require the expertise of a professional plumber. Call a plumber if:
- You’re uncomfortable working with plumbing.
- You can’t identify the source of the leak.
- The leak is caused by a major plumbing problem, such as a cracked pipe inside the wall.
- You’ve tried to fix the leak yourself, but it’s still leaking.
Choosing the Right Replacement Parts
When replacing parts, it’s crucial to choose the right ones. Consider these factors:
- Material: Choose parts made of durable materials, such as brass or PVC.
- Size: Ensure that the replacement parts are the correct size for your plumbing system.
- Compatibility: Make sure that the replacement parts are compatible with your existing plumbing.
Expert Insights on Plumbing Materials
The materials used in your under-sink plumbing play a significant role in its longevity and resistance to leaks. While metal pipes were once the standard, PVC and PEX have gained popularity due to their affordability and ease of installation. Each material has its pros and cons. PVC is resistant to corrosion but can become brittle over time. PEX is flexible and durable but may not be suitable for all applications. Brass fittings, while more expensive, offer excellent durability and resistance to corrosion, making them a reliable choice for critical connections.
Understanding Water Pressure’s Impact
Excessive water pressure can put a strain on your plumbing system, leading to leaks and other problems. If you suspect that your water pressure is too high, consider installing a pressure regulator. A pressure regulator will maintain a consistent water pressure, protecting your pipes and fixtures from damage.
The Value of Regular Plumbing Inspections
Even if you’re comfortable handling minor plumbing repairs, it’s a good idea to schedule regular plumbing inspections with a qualified plumber. A professional can identify potential problems before they turn into major leaks, saving you time, money, and stress in the long run.
Fixing a Leaky Pipe: Getting It Right
Fixing a leaky pipe under your sink is a manageable task for most homeowners. By understanding the plumbing components, identifying the source of the leak, and using the right tools and techniques, you can successfully repair the leak and prevent further damage. Remember to prioritize safety, take your time, and don’t hesitate to call a plumber if you’re unsure about any aspect of the repair. Taking preventative measures, such as regular inspections and maintenance, can also help you avoid leaks in the future. By following these guidelines, you can keep your under-sink plumbing in good working order and protect your home from water damage. So, grab your tools, roll up your sleeves, and get ready to conquer that leaky pipe! The satisfaction of fixing it yourself, not to mention the money you’ll save, is well worth the effort. Now that you know how to fix a leaky pipe under sink, you can tackle the problem with confidence.
