Mastering the Ruger Mark II Disassembly: A Comprehensive Guide
So, you’re looking to disassemble your Ruger Mark II. Whether you’re performing routine maintenance, troubleshooting a problem, or simply curious about the inner workings of this iconic pistol, you’ve come to the right place. This comprehensive guide will walk you through each step of the Ruger Mark II disassembly process, providing detailed instructions, helpful tips, and crucial safety information. We aim to provide a resource that surpasses all others in clarity, accuracy, and helpfulness. Our goal is to empower you with the knowledge and confidence to safely and effectively disassemble and reassemble your Ruger Mark II.
Understanding the Ruger Mark II: A Disassembly Deep Dive
The Ruger Mark II is a semi-automatic pistol renowned for its accuracy, reliability, and simple design. Understanding its mechanics is key to successful disassembly and maintenance. Disassembly, in this context, refers to the process of taking the pistol apart into its major components for cleaning, inspection, or repair. It’s not just about taking things apart; it’s about understanding how each part interacts with the others. This knowledge is crucial for proper reassembly and function.
The Ruger Mark II builds upon the legacy of its predecessor, the Standard Model, and offers improvements in design and functionality. While seemingly straightforward, the Ruger Mark II disassembly can be tricky for the uninitiated. This guide will cover the standard disassembly procedure, addressing common pitfalls and offering solutions based on years of experience.
Understanding the nuances of the Ruger Mark II’s design is vital. For instance, the relationship between the mainspring housing and the bolt stop pin is critical for proper function. Similarly, knowing the correct orientation of the hammer strut during reassembly prevents common malfunctions. These are the details that separate a successful disassembly from a frustrating one.
Disassembly is important for several reasons. Regular cleaning removes fouling and debris that can affect accuracy and reliability. Inspection allows you to identify worn or damaged parts before they cause serious problems. And, of course, understanding the disassembly process empowers you to perform basic repairs and modifications yourself.
Essential Tools for Ruger Mark II Disassembly
Having the right tools will make the Ruger Mark II disassembly process significantly easier and safer. While you might be tempted to improvise, using the correct tools minimizes the risk of damaging your firearm or injuring yourself.
- Screwdrivers: A set of high-quality screwdrivers with various sizes of flat-head and Phillips-head bits is essential. Ensure they fit the screws properly to avoid stripping the heads.
- Punch Set: A set of roll pin punches is invaluable for removing and installing pins without damaging them.
- Hammer: A small, lightweight hammer, preferably with a brass or nylon head, is useful for tapping out pins.
- Cleaning Supplies: Gun cleaning solvent, brushes, patches, and a cleaning rod are necessary for cleaning the pistol after disassembly.
- Gun Oil or Lubricant: A good quality gun oil or lubricant is essential for lubricating the pistol after cleaning.
- Soft Cloth or Mat: A soft cloth or gun mat will protect the pistol’s finish during disassembly and reassembly.
- Safety Glasses: Always wear safety glasses to protect your eyes from flying debris.
- Magnifying Glass (Optional): A magnifying glass can be helpful for inspecting small parts for wear or damage.
Using the right tools not only makes the job easier but also protects the integrity of your firearm. Investing in a quality set of tools will pay off in the long run.
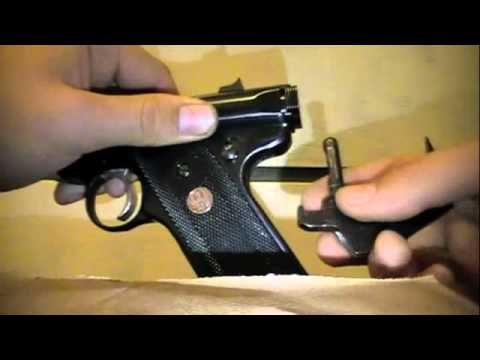
Step-by-Step Ruger Mark II Disassembly Guide
Follow these steps carefully to safely and effectively disassemble your Ruger Mark II. Always ensure the firearm is unloaded before beginning any disassembly procedure.
- Ensure the Pistol is Unloaded: Remove the magazine and visually inspect the chamber to ensure it is empty. Point the pistol in a safe direction throughout the entire process.
- Remove the Magazine: Press the magazine release button to remove the magazine.
- Lock the Bolt Back: Pull the bolt back and engage the manual safety to lock it in the open position.
- Remove the Mainspring Housing Latch: Locate the mainspring housing latch at the bottom of the grip. Pull it down and forward to release the mainspring housing.
- Remove the Mainspring Housing: With the latch released, the mainspring housing should slide out of the frame. You may need to gently tap it with a non-marring hammer.
- Remove the Bolt Stop Pin: With the mainspring housing removed, the bolt stop pin is no longer under tension. Push it out from the left side of the frame.
- Release the Bolt: Disengage the manual safety and carefully allow the bolt to move forward.
- Remove the Bolt Assembly: Grasp the bolt and pull it out of the receiver.
- Separate the Upper Receiver from the Frame: With the bolt removed, you can now separate the upper receiver from the frame. There may be some resistance, but it should slide off with gentle pressure.
- Disassemble the Bolt Assembly (Optional): The bolt assembly can be further disassembled for more thorough cleaning. This involves removing the firing pin, extractor, and other small parts. However, this is generally not necessary for routine maintenance.
Each step is critical, and following the sequence is essential for a smooth disassembly. Pay close attention to the orientation of parts as you remove them, as this will aid in reassembly.
Ruger Mark II Disassembly: Common Challenges and Solutions
Even with detailed instructions, you might encounter some challenges during Ruger Mark II disassembly. Here are some common issues and their solutions:
- Stuck Mainspring Housing: If the mainspring housing is difficult to remove, try applying a small amount of penetrating oil to the area and gently tapping it with a non-marring hammer.
- Tight Bolt Stop Pin: If the bolt stop pin is difficult to push out, ensure the mainspring housing is fully removed and that there is no binding. Use a punch and hammer to gently tap it out.
- Difficulty Separating the Upper Receiver from the Frame: If the upper receiver is stuck to the frame, check for any obstructions or debris. Gently wiggle the receiver back and forth while applying upward pressure.
- Lost or Damaged Parts: Always work in a clean, well-lit area to minimize the risk of losing small parts. If a part is damaged, replace it with a new one.
Patience is key. Avoid forcing anything, as this can damage the firearm. If you encounter a problem you can’t solve, consult a qualified gunsmith.
Cleaning and Inspection After Disassembly
Once you’ve disassembled your Ruger Mark II, it’s time to clean and inspect the parts. This is a crucial step in maintaining the pistol’s performance and reliability.
- Cleaning: Use gun cleaning solvent and brushes to remove fouling and debris from all parts. Pay particular attention to the barrel, bolt face, and firing pin channel.
- Inspection: Carefully inspect each part for wear, damage, or cracks. Replace any parts that are worn or damaged. Check the firing pin for proper movement and ensure the extractor is functioning correctly.
- Lubrication: After cleaning and inspection, lubricate all moving parts with a good quality gun oil or lubricant. Apply a light coat of oil to the barrel, bolt, and frame.
Proper cleaning and lubrication are essential for preventing corrosion and ensuring smooth operation. Neglecting this step can lead to malfunctions and reduced accuracy.
Ruger Mark II Reassembly: Putting It All Back Together
Reassembly is essentially the reverse of disassembly, but it’s important to pay close attention to detail to ensure everything is properly aligned and functioning correctly.
- Reattach the Upper Receiver to the Frame: Slide the upper receiver back onto the frame until it clicks into place.
- Insert the Bolt Assembly: Slide the bolt assembly back into the receiver.
- Lock the Bolt Back: Pull the bolt back and engage the manual safety to lock it in the open position.
- Insert the Bolt Stop Pin: Insert the bolt stop pin from the left side of the frame.
- Reinstall the Mainspring Housing: Align the mainspring housing with the frame and slide it in until it clicks into place. Ensure the mainspring housing latch engages properly.
- Test the Function: Disengage the manual safety and cycle the bolt several times to ensure it is functioning smoothly.
- Reinsert the Magazine: Insert the magazine into the magazine well.
Double-check that all parts are properly installed and that the pistol is functioning correctly before using it. If you encounter any problems, review the disassembly and reassembly steps carefully.
Maintaining Peak Performance: Long-Term Care for Your Ruger Mark II
Proper maintenance is key to ensuring the long-term performance and reliability of your Ruger Mark II. Regular cleaning, inspection, and lubrication will keep it functioning smoothly for years to come.
- Regular Cleaning: Clean the pistol after each shooting session to remove fouling and debris.
- Periodic Inspection: Inspect the pistol regularly for wear, damage, or cracks.
- Proper Lubrication: Lubricate all moving parts with a good quality gun oil or lubricant.
- Safe Storage: Store the pistol in a safe, dry place, away from children and unauthorized individuals.
By following these simple maintenance tips, you can ensure that your Ruger Mark II remains a reliable and accurate firearm for many years.
Ruger Mark II: A Trusted Companion
Mastering the Ruger Mark II disassembly process empowers you to care for your firearm properly, ensuring its longevity and optimal performance. By understanding the steps involved, addressing common challenges, and implementing a routine maintenance schedule, you can confidently maintain your Ruger Mark II for years to come. We encourage you to use this knowledge to deepen your understanding of this classic firearm and to share your experiences with fellow enthusiasts. Consider this guide your go-to resource for all things Ruger Mark II disassembly, ensuring safe and effective maintenance practices for your trusted companion.
