Stop the Drip: Expert Guide to Fixing a Leaky Sink
A leaky sink. Just the words can send shivers down a homeowner’s spine. That incessant drip, drip, drip isn’t just annoying; it’s a sign of wasted water, potential water damage, and a looming increase in your water bill. But don’t despair! This comprehensive guide is your one-stop resource for diagnosing, understanding, and ultimately fixing that pesky leaky sink. We’ll provide you with the knowledge and confidence to tackle this common household problem, saving you money and preventing further damage. Whether you’re a seasoned DIY enthusiast or a complete novice, we’ll walk you through each step with clear, expert advice. Get ready to say goodbye to that drip and hello to a dry, functional sink!
Understanding the Anatomy of a Leaky Sink
Before you can effectively fix a leaky sink, it’s crucial to understand the various components that make up your sink’s plumbing system. A leaky sink isn’t always the straightforward problem it seems; the source can vary widely. Let’s break down the key elements:
- Faucet Body: The main structure of the faucet, housing the valve cartridges or compression stems that control water flow.
- Spout: The curved or straight pipe that delivers water into the sink basin. Leaks can occur where the spout connects to the faucet body.
- Handles: Used to control the hot and cold water supply. Leaks around the base of the handles often indicate worn O-rings or cartridges.
- Supply Lines: Flexible tubes that connect the shut-off valves to the faucet. These can leak at the connections due to corrosion or loose fittings.
- Shut-Off Valves: Located under the sink, these valves control the water supply to the faucet. It’s crucial to know their location and how to use them before starting any repair.
- Drain Assembly: Consists of the sink flange (the part you see in the sink basin), the tailpiece, the P-trap, and the drainpipe. Leaks in this area are often caused by loose connections or deteriorated washers.
- P-Trap: The curved section of pipe under the sink that traps debris and prevents sewer gases from entering your home.
Understanding these components is half the battle. Recognizing where the leak is originating will guide your troubleshooting and repair efforts, saving you time and frustration.
Common Causes of Leaky Sinks: An Expert Diagnosis
Pinpointing the exact cause of a leaky sink requires a bit of detective work. Here are some of the most frequent culprits:
- Worn-Out Washers and O-Rings: These small rubber or silicone components provide a seal between moving parts. Over time, they can become brittle, cracked, or worn, leading to leaks. This is a very common cause.
- Loose Connections: Vibrations and normal use can loosen nuts and fittings on supply lines, drainpipes, and faucet components.
- Corroded or Damaged Pipes: Corrosion can weaken pipes, leading to pinhole leaks or complete failure. Similarly, physical damage can cause cracks or breaks.
- Faulty Faucet Cartridges: Cartridge faucets rely on internal cartridges to control water flow. These cartridges can wear out or become damaged, resulting in leaks.
- Improperly Installed Plumbing: Sometimes, leaks are the result of poor installation practices. This is especially true in older homes or after recent renovations.
- High Water Pressure: Excessive water pressure can put stress on plumbing components, accelerating wear and tear and increasing the likelihood of leaks.
By carefully examining your leaky sink and considering these potential causes, you can narrow down the source of the problem and choose the appropriate repair strategy. Remember to always turn off the water supply before attempting any repairs!
Essential Tools and Materials for Fixing a Leaky Sink
Before you dive into fixing your leaky sink, gather the necessary tools and materials. Having everything on hand will make the repair process smoother and more efficient. Here’s a comprehensive list:
- Basin Wrench: Used to loosen and tighten nuts in hard-to-reach places, such as the faucet mounting nuts.
- Adjustable Wrench: A versatile tool for loosening and tightening various nuts and bolts.
- Pliers: Useful for gripping and manipulating small parts.
- Screwdrivers (Phillips and Flathead): Essential for removing faucet handles and other components.
- Plumber’s Putty: Used to seal connections and prevent leaks.
- Teflon Tape (Plumber’s Tape): Applied to threaded connections to create a watertight seal.
- Replacement Washers and O-Rings: Keep a variety of sizes on hand to match the existing ones.
- New Faucet Cartridges: If you suspect a faulty cartridge, purchase a replacement that matches your faucet model.
- Penetrating Oil: Helps to loosen corroded or stuck nuts and bolts.
- Bucket: To catch any water that may drip during the repair process.
- Clean Rags or Towels: For wiping up spills and cleaning parts.
- Safety Glasses: Protect your eyes from debris and splashes.
- Gloves: Protect your hands from dirt and grime.
Investing in a good set of plumbing tools will pay off in the long run, allowing you to tackle a variety of household repairs with confidence.
Step-by-Step Guide to Fixing a Leaky Faucet
A leaky faucet is one of the most common types of leaky sink problems. Here’s a detailed guide to fixing it:
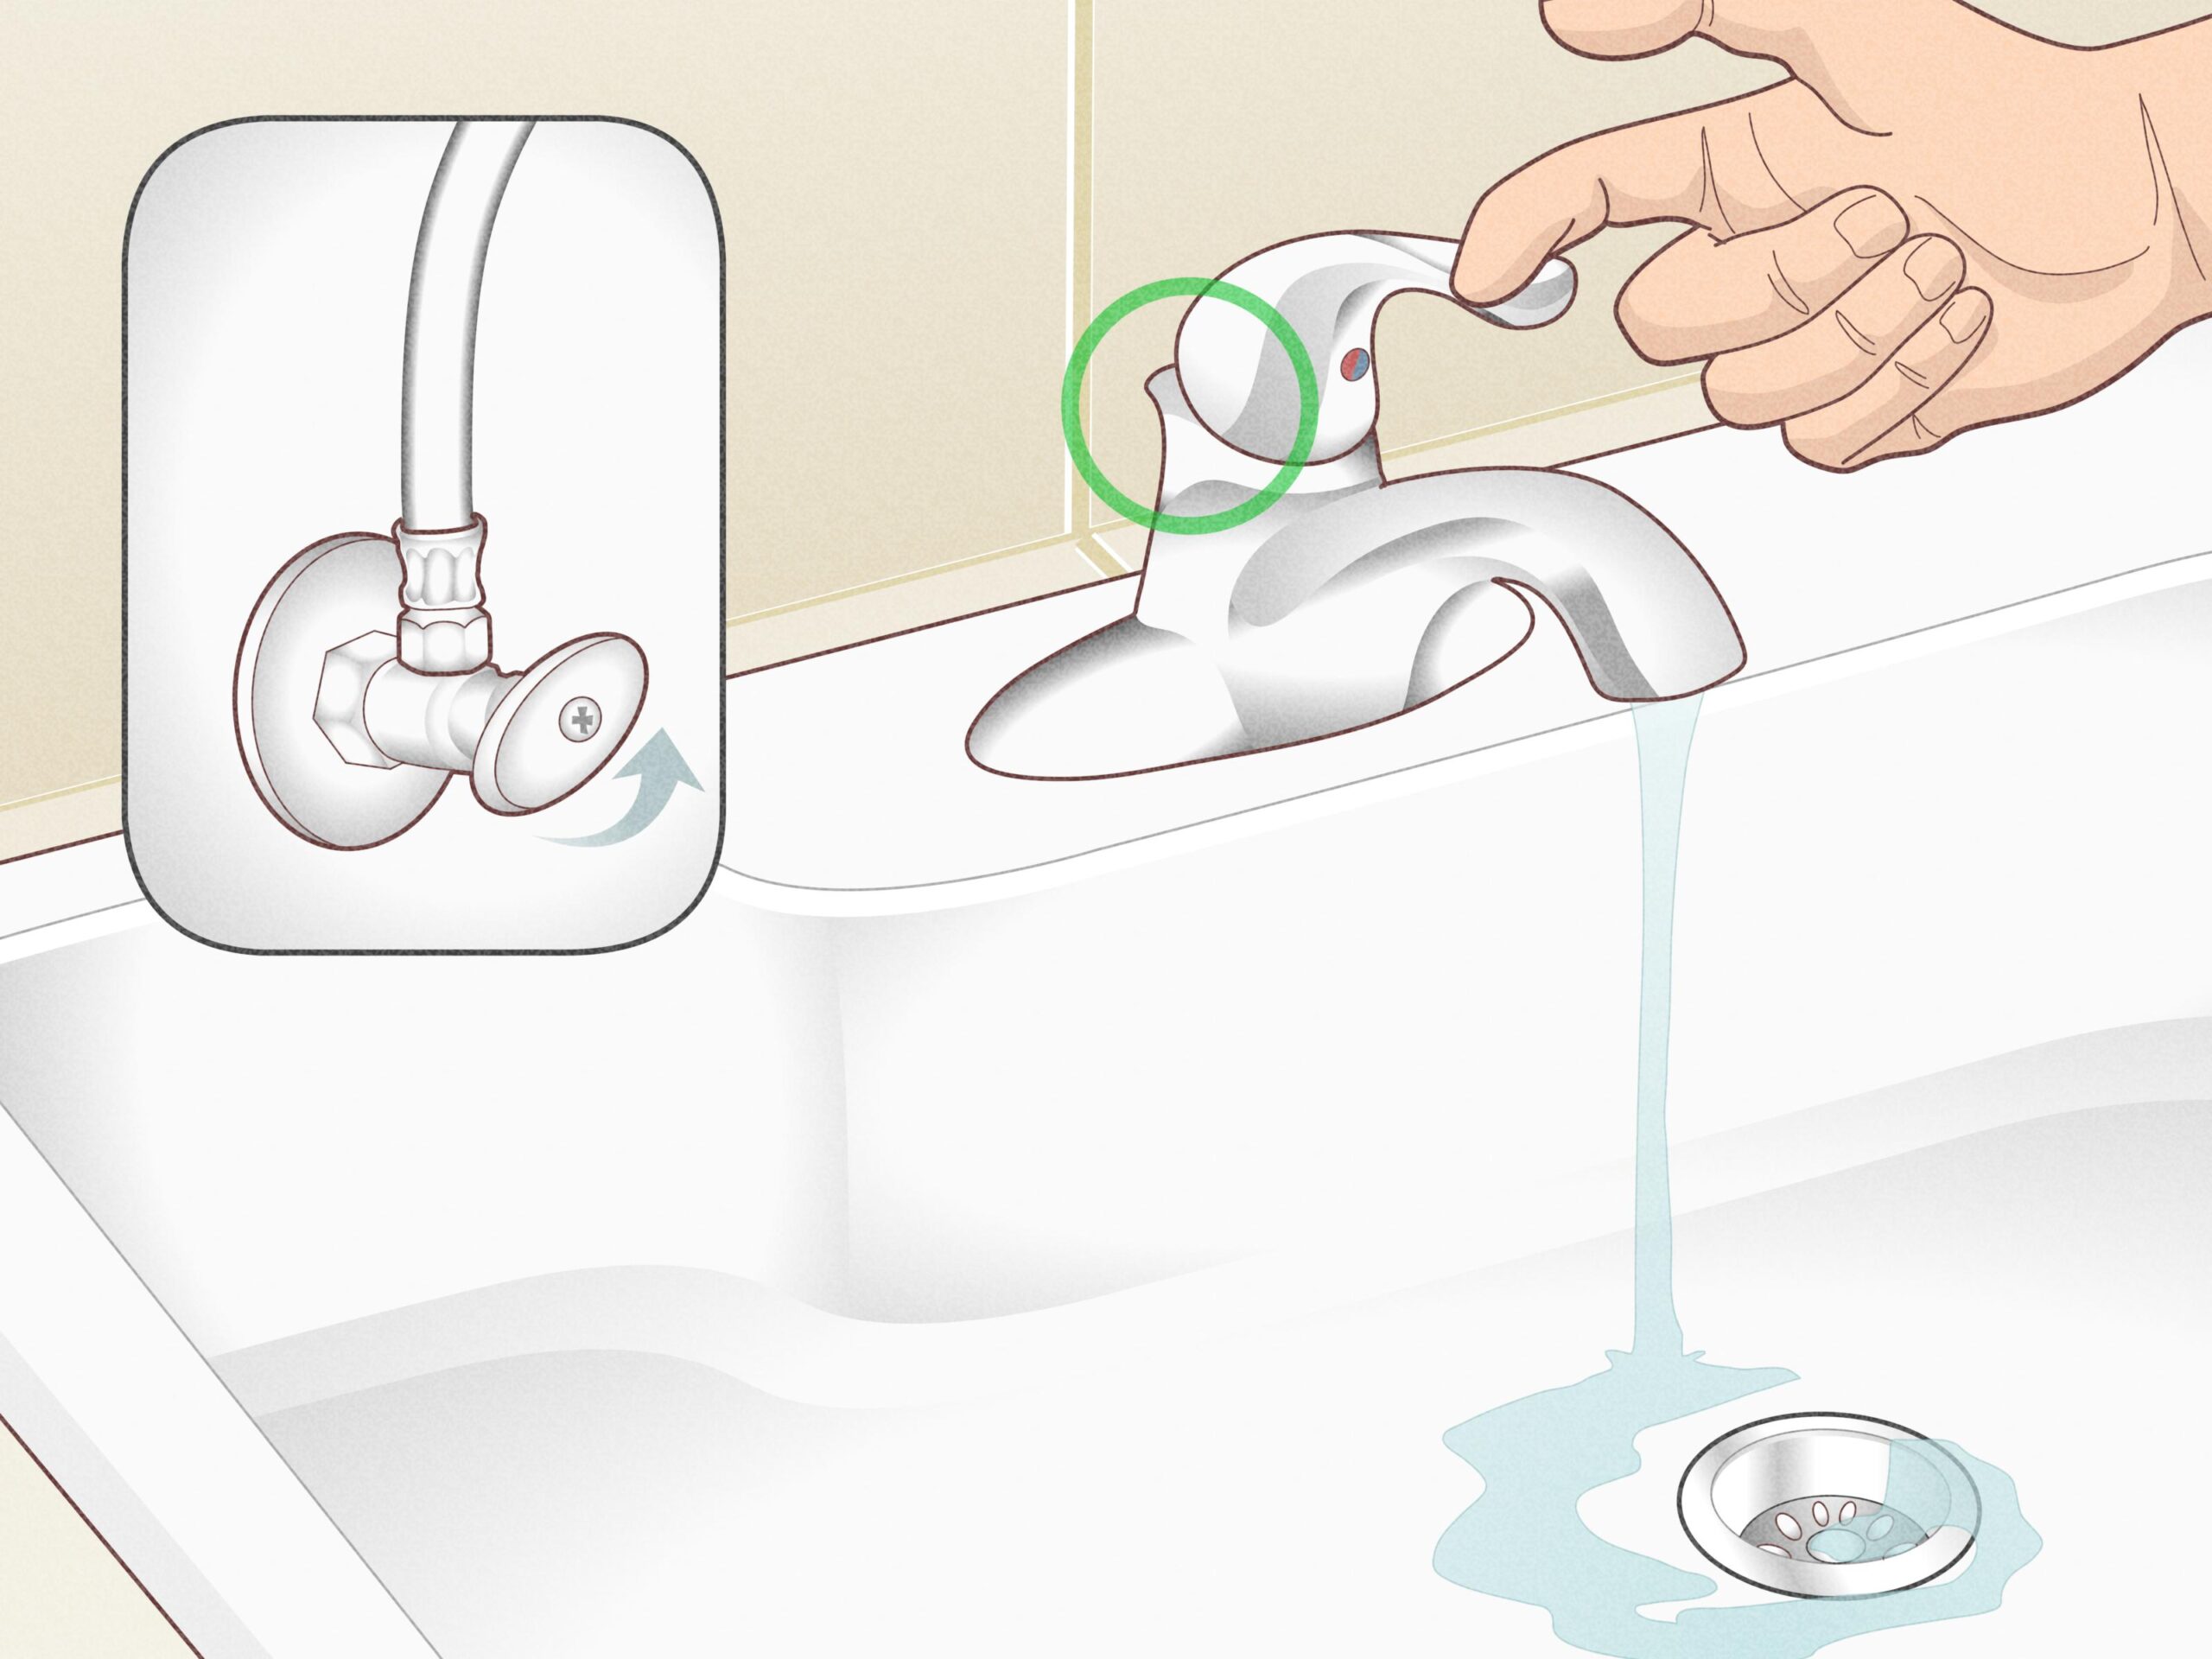
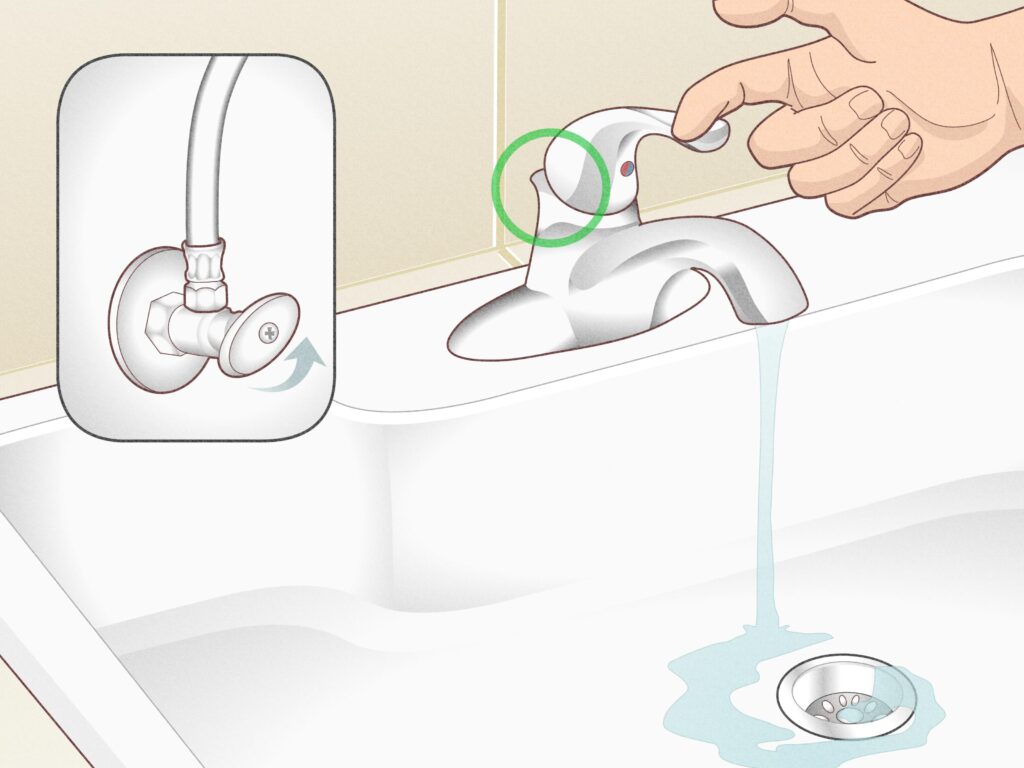
- Turn Off the Water Supply: Locate the shut-off valves under the sink and turn them clockwise until they are completely closed. If you don’t have shut-off valves, you’ll need to turn off the main water supply to your house.
- Protect the Sink: Cover the sink basin with a towel or cloth to prevent scratches.
- Remove the Faucet Handle(s): Depending on the faucet type, you may need to remove a decorative cap or screw to access the handle screw. Use a screwdriver to remove the screw and gently pull off the handle.
- Identify the Faucet Type: Determine whether you have a compression faucet, a cartridge faucet, a ball faucet, or a ceramic disc faucet. Each type requires a slightly different repair approach.
- Replace Worn Parts: For compression faucets, replace the worn washers and O-rings. For cartridge faucets, replace the entire cartridge. For ball faucets, replace the O-rings and springs. For ceramic disc faucets, replace the entire ceramic disc cylinder (less common).
- Reassemble the Faucet: Carefully reassemble the faucet, ensuring that all parts are properly aligned and tightened.
- Turn on the Water Supply: Slowly turn the shut-off valves counterclockwise to restore the water supply. Check for leaks.
- Test the Faucet: Turn the faucet on and off to ensure that it is functioning properly and that the leak is gone.
If the leak persists after following these steps, you may need to consult a professional plumber.
Addressing Leaks in the Sink Drain Assembly
Leaks in the sink drain assembly are often caused by loose connections or deteriorated washers. Here’s how to fix them:
- Turn Off the Water Supply: As always, start by turning off the water supply.
- Inspect the Drain Assembly: Carefully examine the drainpipes, connections, and washers for any signs of leaks or damage.
- Tighten Loose Connections: Use an adjustable wrench to tighten any loose nuts or fittings. Be careful not to overtighten, as this could damage the pipes.
- Replace Worn Washers: If you find any deteriorated washers, replace them with new ones.
- Apply Plumber’s Putty: If the leak is coming from the sink flange, remove the flange and apply a fresh bead of plumber’s putty around the opening before reinstalling it.
- Reassemble the Drain Assembly: Carefully reassemble the drainpipes and connections, ensuring that everything is properly aligned and tightened.
- Test for Leaks: Turn on the water supply and check for leaks.
If the leak persists, you may need to replace a section of the drainpipe or consult a plumber.
Preventing Future Leaky Sink Problems
Prevention is always better than cure. Here are some tips to help prevent future leaky sink problems:
- Regularly Inspect Your Plumbing: Check under your sinks for any signs of leaks or corrosion.
- Tighten Loose Connections: Periodically tighten any loose nuts or fittings on supply lines and drainpipes.
- Replace Worn Parts: Replace worn washers, O-rings, and faucet cartridges as needed.
- Avoid Over-Tightening: Over-tightening nuts and bolts can damage pipes and connections.
- Use a Water Softener: If you have hard water, consider installing a water softener to prevent mineral buildup and corrosion.
- Monitor Water Pressure: High water pressure can put stress on your plumbing system. Consider installing a pressure regulator to maintain a safe pressure level.
- Be Careful What You Put Down the Drain: Avoid pouring grease, oil, or other debris down the drain, as this can clog the pipes and lead to leaks.
When to Call a Professional Plumber
While many leaky sink problems can be resolved with DIY repairs, there are times when it’s best to call a professional plumber. Consider calling a plumber if:
- You are uncomfortable working with plumbing.
- You are unable to identify the source of the leak.
- The leak is severe or causing water damage.
- You suspect a major plumbing problem.
- You have tried to fix the leak yourself, but it persists.
A qualified plumber has the knowledge, skills, and tools to diagnose and repair complex plumbing problems safely and effectively. Attempting to fix a problem beyond your skill level could lead to further damage or injury.
Choosing the Right Faucet: A Guide to Quality and Durability
When it’s time to replace your faucet, selecting a high-quality and durable model is crucial to prevent future leaks and ensure long-lasting performance. Consider these factors when choosing a new faucet:
- Material: Choose faucets made from durable materials such as solid brass or stainless steel. Avoid faucets made from plastic or other low-quality materials.
- Finish: Select a finish that is resistant to corrosion and tarnishing. Popular options include chrome, brushed nickel, and oil-rubbed bronze.
- Valve Type: Consider the type of valve used in the faucet. Ceramic disc valves are generally considered to be the most durable and leak-resistant.
- Brand Reputation: Choose a faucet from a reputable brand known for quality and reliability.
- Warranty: Look for a faucet with a comprehensive warranty that covers defects in materials and workmanship.
Investing in a high-quality faucet will save you money and hassle in the long run.
Expert Insights on Resolving Your Leaky Sink
Fixing a leaky sink doesn’t have to be a daunting task. By understanding the components of your sink, identifying the cause of the leak, and following the step-by-step instructions in this guide, you can often resolve the problem yourself. Remember to always prioritize safety by turning off the water supply before attempting any repairs. And, when in doubt, don’t hesitate to call a professional plumber. Share your own experiences with fixing a leaky sink in the comments below, or explore our advanced guides to related plumbing topics. With the right knowledge and tools, you can keep your sink dry and your water bill under control.
